Unit 4- Painting and Toning
| sp_unit_4-_toning.doc | |
| File Size: | 122 kb |
| File Type: | doc |
Key Concepts
•Photographic Composition
• Unusual Perspectives
• Cropping
• Filters
• Photography as a communicator
• Camera Angles
• Enlarging Negatives
• Camera Uses
• Mat Cutting
• Toning
• Unusual Perspectives
• Cropping
• Filters
• Photography as a communicator
• Camera Angles
• Enlarging Negatives
• Camera Uses
• Mat Cutting
• Toning
Unit Vocabulary
• negative
• matting
•Depth of Field
•lens
•exposure
•f-stop
•bird’s eye view
• worm’s eye view
• filters
• cropping
• bracketing
• exposure
• leading lines
• agitate
• emulsion
• aperture
• still life
• rule of thirds
• light meter
• film speed
• shutter speed
• sunny 16 rule
• matting
•Depth of Field
•lens
•exposure
•f-stop
•bird’s eye view
• worm’s eye view
• filters
• cropping
• bracketing
• exposure
• leading lines
• agitate
• emulsion
• aperture
• still life
• rule of thirds
• light meter
• film speed
• shutter speed
• sunny 16 rule
Learner Objectives
1. Define and use unit vocabulary.
2. Use their 35mm camera to take concentration photographs.
3. Create a good camera exposure with your 35mm film camera.
4. Apply techniques demonstrated in class to create a positive prints.
5. Analyze their own work to make developing adjustments.
6. Demonstrate toning techniques on prints.
7. Successfully mat their projects by using the matt cutter.
8. Develop film in class.
9. Make their own developer in class.
10. Create a hand-painted 8x10 photograph.
Handouts
Hand Coloring using Marshal oils
Hand Colored Photo Project
Make a good print on black and white paper. This print should be slightly lighter or under exposed .
We will be use the Marshals photo oils for this project. (They are very expensive!)
Squeeze a SMALL amount out on a color pallet provided in the tool box. Use a Q-tip swab to rub a small amount of the paint into a central area on your subject.
BLOT this area with a cotton swab as demonstrated in class. This smoothes out the paint and softens the look.
Look at the samples in the book and review the class demonstration by the instructor BEFORE you do this assignment. TAKE YOUR TIME, a good hand colored print takes 2 hours to complete...it is very tedious work.
Use a cotton piece on a tooth pick or a kneeded eraser to remove paint.
It takes 2 days for paint to dry, place labeled print with your name on the dry area in the back of the lab.
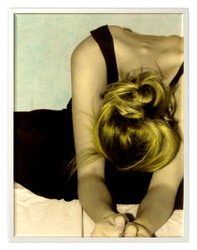
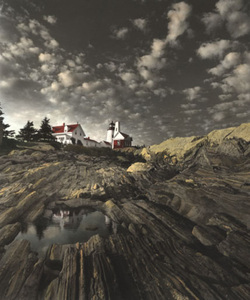
This is a sample of a hand colored photograph. This one was somewhat easy and only took about an hour to do. Large shapes like the grass and sky or trees makes it easy. The more detail a photo has the harder it is to hand color.
